Ensuring Quality with Dimensional Inspection Services
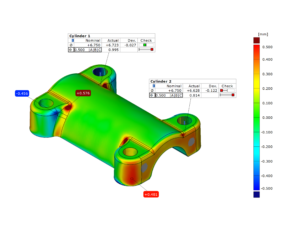
Dimensional inspection helps ensure your products meet your organization’s standards for quality. Sentinel 3D’s service offerings currently include 3D scanning, mesh inspection, and point cloud inspection. Part sizes ranging from 5 millimeters up to 4 meters can be inspected. Additionally, we will soon expand our services to include optical measuring machine (OMM) and coordinate measuring machine (CMM) inspections for limited part sizes.
Our dimensional inspection services can aid your company by:
– Acting as your company’s external incoming quality control (IQC) or outgoing quality control (OQC) lab
– Pitching in to help when your inspection or metrology lab is backlogged
– Acquiring data with tools your organization may not have access to
– Acting as an unbiased third party to verify existing inspection results
– Identifying the root cause of product failures
Our metrology lab, located in Kirkland’s Totem Lake neighborhood, serves customers throughout the greater Seattle area and throughout the pacific northwest. Contact us today to find out if your 3D inspection project would be a good fit for Sentinel 3D!
Equipment and Software
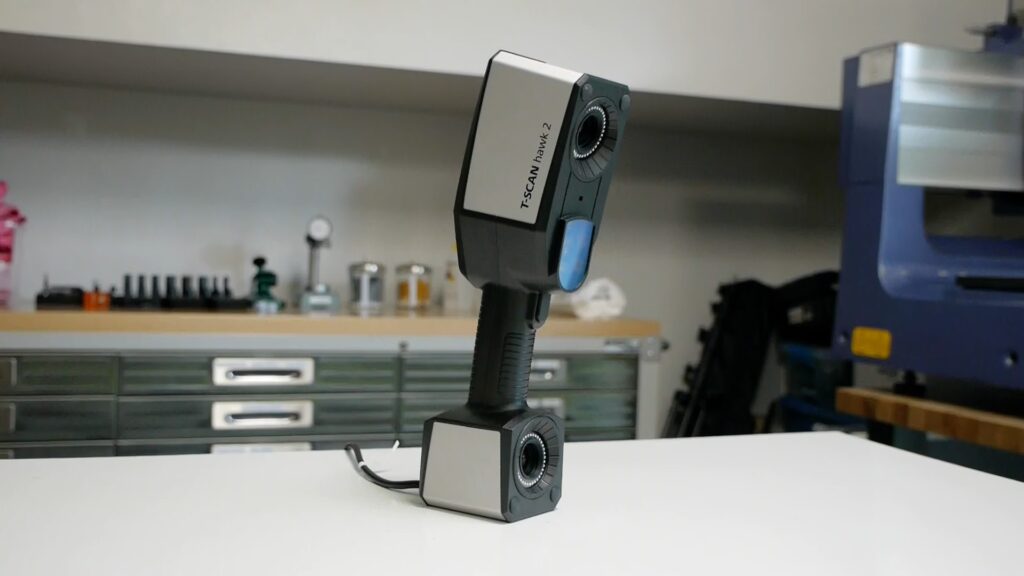
Zeiss T-Scan Hawk 2
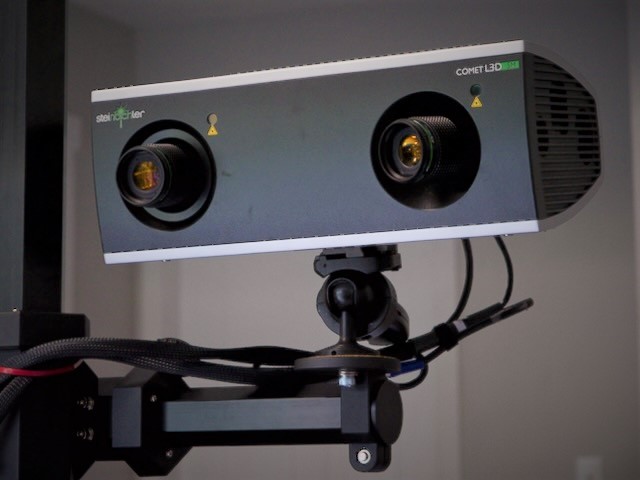
Steinbichler Comet L3D 5M
Our structured light 3D Scanner comes with an assortment of lenses to ensure high accuracy 3D scans for a variety of sample sizes. This scanner works especially well for scanning small objects.
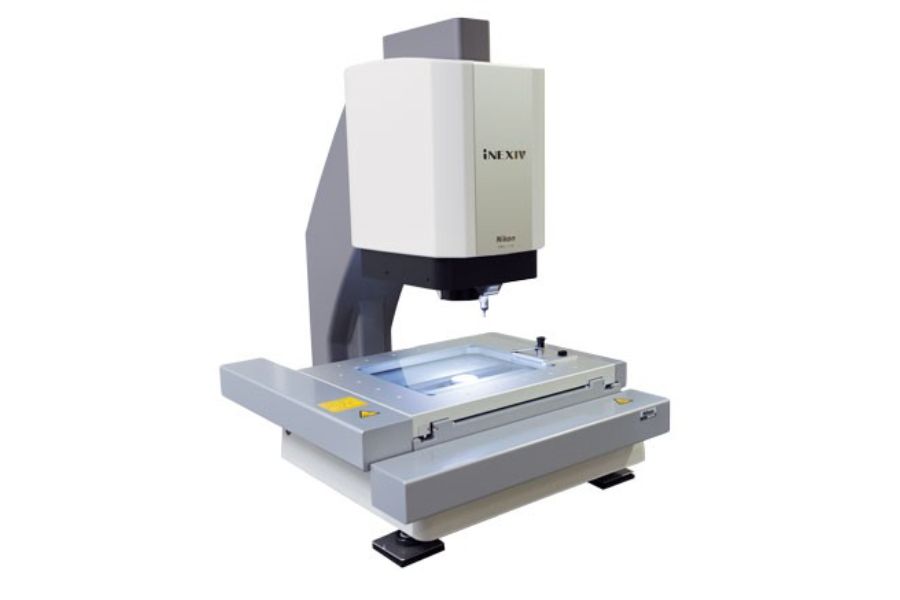
Nikon VMA-2520
The Nikon VMA-2520 is a multisensor optical measuring machine (OMM) with touch probe capabilities. It is well suited for measuring small, short parts up to 200x200mm in area and 50mm in height.

PolyWorks Inspector
We use PolyWorks Inspector to inspect meshes and point clouds. It can evaluate geometric dimensioning and tolerancing (GD&T) and produce intuitive reports.

CMM-Manager
We use CMM-Manager to acquire measured data using vision sensors and touch probes.
First Article Inspection
First Article Inspection (FAI) is a quality assurance process in manufacturing where the first produced part is meticulously inspected and validated against design specifications before mass production. Typically driven by the SAE AS9102 standard, FAIs help provide evidence that a manufacturer’s process is up to the task of producing compliant products.
Dimensional inspection is typically a major component in FAIs. In most cases, parts must be fully inspected against its associated mechanical drawing for the FAI to be considered complete. This is where we come in.
Sentinel 3D Scanning’s dimensional inspection services can assist your company with FAIs by fully inspecting your parts and assemblies. Using 3D scanning technologies alongside more conventional measurement equipment, we’re committed to providing a high standard of precision by means of high-accuracy measurement equipment, years of industry experience, and our commitment to excellence.
And whether your drawings are based on ASME Y14.5 or ISO 1101, we can provide comprehensive, yet simple, first article inspection reports. If your company doesn’t have its own FAI template, we base our reports on ASME Y14.45 – ASME’s new measurement data reporting standard.
Failure Analysis
Failure analysis is the systematic investigation of the root causes behind a product or system’s malfunction. Sometimes these malfunctions are caused by out-of-tolerance features or physical interference between assembled part surfaces. When this happens, teaming up with Sentinel 3D Scanning can expedite your failure analysis investigation, helping you find the root cause more quickly.
One common root cause for assembly issues is unwanted interference between parts or subassemblies. If a detailed tolerance analysis was performed prior to manufacturing, and all the parts were inspected, it is unlikely that this will happen. But sometimes these things do slip through the cracks due to competing priorities. In these cases, dimensional failure analysis can accelerate the failure analysis process.
If a dimensional failure is suspected, a variety of failure analysis techniques can be employed. 3D scanning collects a high quantity of points all over the part in question, which can highlight issues that occur in a very localized region. These high-density point clouds can also be used in heat maps and sectional views to provide a more comprehensive picture of what is going on across all the surfaces, providing more useful information than a typical inspection report. And when chasing down location and interference issues, 3D scans of multiple parts can be assembled virtually, revealing interior views of the assembly that were previously hidden from view.
At Sentinel 3D Scanning, our Dimensional Failure Analysis services stand as a cornerstone of our commitment to precision and quality. We collaborate with you to identify and rectify dimensional issues, guaranteeing that your products either meet or surpass your company’s standards. Make us your personal failure analysis lab when uncovering defects!
Trust Sentinel 3D Scanning for Accurate Measurement Results
Traceable Results
We regularly calibrate our measurement equipment and calibration standards to ensure our tools are performing at their maximum potential. We also perform regular accuracy tests to better understand the capabilities and limitations of our systems.
Simple
We do everything we can to make the inspection of your parts as easy as possible for our customers – from the initial discussion all the way up to the payment process.
Certified Personnel
Employees hold certifications in the engineering, quality, and inspection fields, originating come from accredited universities and nationally recognized organizations like the American Society for Quality and the American Society of Mechanical Engineers.
SIMPLE PRICING FOR COMPLEX MEASUREMENTS
Use the calculator below to gain insight into what your project may cost. Contact us to receive a more accurate formal estimate. Please note that pricing may change at any time. See our pricing page for additional cost calculators.
Contact us today for a free estimate!
How Our Inspection Process Works
Once the parts have arrived, they will need to go through several steps prior to inspection.
Soak
ASME Y14.5 specifies that unless otherwise stated, dimensions and tolerances are applicable at 20 degrees Celsius. Because of this, samples will need some time to “soak” prior to being scanned. This soaking time will allow the sample’s temperature to stabilize, matching the temperature of our lab.
Clean
3D scans will contain accurate data of the parts surface, including any dirt or dust that may be present. To eliminate these errors, samples are cleaned. Cleaning samples will also help in the next two steps.
Alignment Targets
Most types of 3D scanners rely on targets/markers to align all the scans to each other. These target stickers, which are sometimes also called markers, are applied by hand on either the surfaces to be scanned, or the fixture the part will be constrained to.
Fixturing
For most scanning projects, samples must be constrained during the scanning process. Fixturing can be something simple, like hot glue or Blu-Tack reusable adhesive. But in more complicated cases, universal fixturing or a custom fixture must be used.
Coating
Not all surfaces are good candidates for 3D scanning. For instance, structured light 3D scanners may struggle to collect noise-free, accurate data on transparent, reflective, or dark parts. In these cases, a thin coating can be applied. The selected coating will depend on a few factors. Evaporating coatings are available for more sensitive samples.
After turning on the 3D scanner, it must warm up to its operating temperature. Then, it will need to be calibrated. This will ensure that measured data will be accurate and traceable to international standards.
With the part prepared and the scanner calibrated, the 3D scan can finally start. The data acquisition typically takes somewhere between 30 minutes and 2 hours depending on the complexity of the sample. If both sides of an object are being scanned, it will need to be flipped, cleaned, fixtured, and coated (if applicable) again prior to completing the scan of the other side.
Once the scan is complete, it is time to tear down the setup. The sample will be removed from the fixture, its coating cleaned (if applicable), and the target stickers will be removed. Samples will be stored until they are ready to be returned.
The scan data is imported into analysis software to be inspected. This inspection can reference a CAD model if one is available. When the inspection is complete, reports are generated and exported.
The inspections results are delivered for your review. If necessary, a video call can be scheduled to discuss the results in greater detail.
Supported Standards for Geometric Dimensioning and Tolerancing (GD&T)
In addition to traditional tolerances like lengths, diameters, distances, and angles, Sentinel 3D Scanning can also inspect geometric tolerances specified in standards like ASME Y14.5 and ISO 1101. Deviation plots for tolerances like surface profile, position, and flatness can also be provided in addition to numerical results.


Dimensional Inspection Frequently Asked Questions (FAQ)
What is dimensional inspection?
Dimensional inspection is the process of measuring dimensions on a part or assembly to verify it meets product requirements. Dimensions can include traditional tolerances like distances and angles, or it can include geometric tolerances like flatness, position, and surface profile. In some cases, surface texture measurements are also included.
What is the purpose of dimensional inspection?
The purpose of a dimensional inspection is to validate that all the dimensions and tolerances provided on a mechanical drawing are within specification.
What is a dimensional inspection report?
A dimensional inspection report is a document containing the findings of a dimensional inspection. These physical or digital reports can include attribute and/or variable data pertaining to the physical parts or assemblies.
What tools are used in dimensional inspections?
A variety of inspection, measuring, and test equipment can be used to perform dimensional inspections. The equipment used is typically left up to the organization performing the inspection, but in some cases, the customer may dictate which equipment is used.
We primarily use 3D scanners to inspect parts, but we will be adding more types of inspection equipment in the future. Other common types of inspection equipment include coordinate measuring machines, vision/optical measuring machines, CT scanners, and hand tools.
How accurate are inspection results?
The accuracy of inspection results will depend on a few factors, such as measurement equipment, the operator, the tolerance being inspected, and environmental conditions. For most projects, following a 10:1 tolerance to measurement equipment accuracy specification is sufficient. If we have concerns that our equipment will not meet this requirement, we will notify you before starting the job. For more critical inspection jobs, uncertainty can be estimated, but it will add additional costs to the project.
If you’re just looking for ballpark accuracy numbers, our Steinbichler Comet L3D typically achieves accuracies less than 5 microns for smaller (<100mm) parts, and less than 20 microns for larger (100-500mm) parts.
How is the accuracy of equipment maintained?
We perform manufacturer recommended calibration routines on our 3D scanners before use and periodically check system accuracy by measuring calibrated ball bars.
What size parts can you measure?
Currently, Sentinel 3D Scanning focuses on tiny (>3mm) to medium sized (<1000mm) parts.
